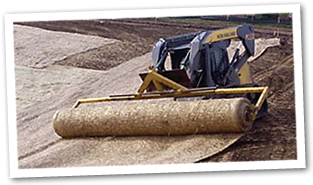
Channel Installation
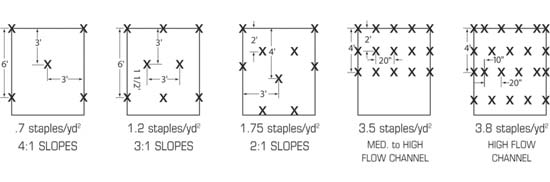
ero-guard staple pattern
Prepare the seedbed to your specifications or liking by leveling, tilling, fertilizing and seeding When installing the Rolled Erosion Control Product (RECP) you must first start at the top of the slope by digging a 6” X 6” trench. Once the trench is dug, you must pull at least 12” of the blanket past the trench, place a row of staples anchoring the blanket in the bottom of the trench approximately 12” apart. Once this has been completed, you must then fill the trench back in with the excavated soil, folding the 12” piece of blanket over the top and again anchoring it with staples.
Roll the middle blanket out in the direction that the water is to flow down the channel. Once the blanket is unrolled and in its desired position, it is time to anchor it to the soil. For this follow the pattern shown on the Ero-Guard Staple Pattern Guide.
When placing more than one blanket down the length of the channel you must tile them like shingles, end over end, overlapping about 6”. Once in place, to anchor the blanket you must place 2 rows of staples 3” apart in a staggering pattern, and 4” apart on center across the entire overlap of the blanket.
Once the channel blankets have been installed the top edge of the slope side must be anchored into a 6” X 6” trench with staples, then backfilled and compacted.
When placing adjacent blankets to the channel, they must be overlapped about 6”, and stapled according to the Ero-Guard Staple Pattern.
If placing the blanket into high flow channels, staple check slots are highly recommended at 40’ intervals to help maintain the erosion protection offered by the blanket. To do this, place a double row of staggered staples, 4” apart and 4” on center across the entire flow area.
When you reach the desired end of the flow channel, the end of the blanket must be anchored. To do this, dig a trench 6” X 6”, anchor the blanket into the trench with 12” spacing between staples. Finally, backfill and compact the trench.